How to render in 3ds Max?

In this tutorial we will see how to render in 3ds Max. We show you step-by-step how to render a digital photo of your item, character or scene. If you’re interested in rendering in 3ds Max, read on because now we get started.
In many cases, after modeling our object or character, we want to render to present it in our social networks or portfolio. That’s why we decided to create this tutorial on how to render in 3ds Max, the most popular modeling program among users. In this lesson, I will use a model that I created, but you can use any model you want to render.
What is the render of 3D modeling?
Before we start a tutorial on how to render in 3ds Max, let’s see what we mean by render. A render is nothing more than a digital image created from a model or a 3D rendered scene. When rendering, the goal is to take a high-quality digital image and then present it. We should not forget that there is a process such as modeling, texture, lighting that we need to do beforehand for a perfect render. All these operations will make the render very high quality and in some cases we can make it realistic depending on the object or scene.
How to render in 3ds Max modeling program?
Let’s get to the important part of the tutorial, how to render in 3ds Max. This process may be a bit complicated, but don’t worry, if you follow all the steps we’ll explain, you won’t have any problems.
Camera placement
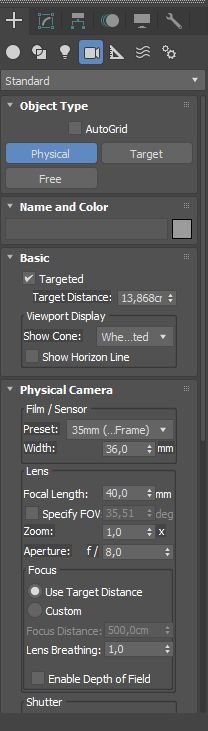
The first important step in rendering in 3ds Max is camera placement. We will go to the right side where we find different tools to be able to place the camera. Here we will see a “+” symbol. We click on this tab to search for the camera. In this tab we find some options under the icons. In these functions we find icons such as circle, geometry, light bulb. When we click with the mouse and go inside, we will see that some functions have been changed below. In these we will see Object Type and different camera types. Here we will choose one called “Physical”. Select by clicking with the mouse.
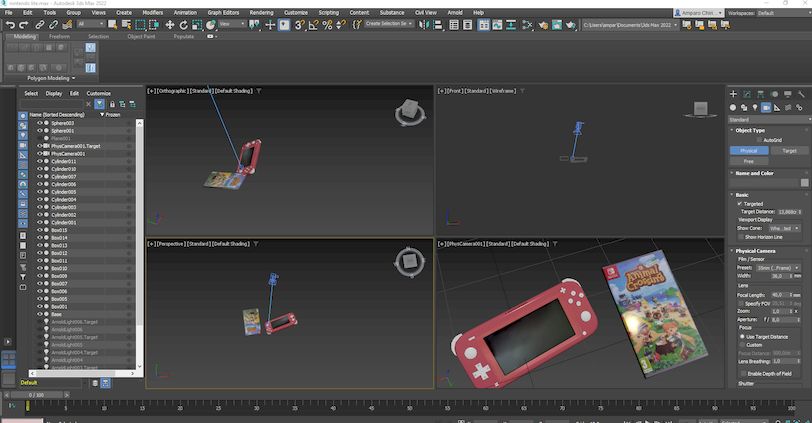
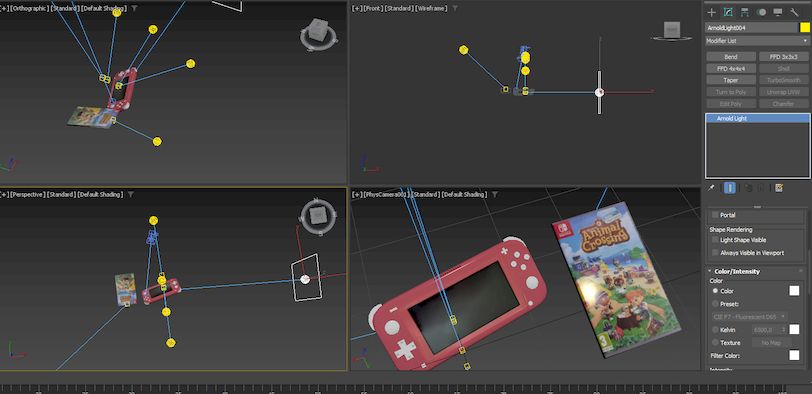
When we select it, we will go to the stage and right click and move the mouse to place the camera. If you expose four different windows from all views here in 3ds Max you will be able to better position the camera and even leave one of the windows with the camera view. To take the camera view, simply press the “C” key while the window you want to see is selected.
Placing the lights
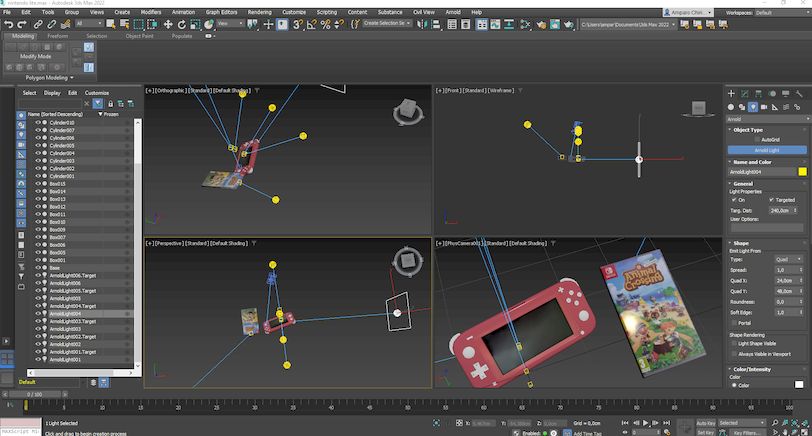
The next step we will do is place the lights so that we can then see the render correctly. If we do not place the lights, the render will be very dark and we will not be able to see the object or character well. We will go back to the right side where we find all the tools to be able to add the lights and in the “+” tab we will look for an icon in the form of a light bulb below. This icon is the third option we found.
Once inside this icon we will see a drop down menu. We will open it to select the “Arnol” option. Now we had to change the lower part of the tools, now we will press this option where we will find “Arnold Light”. After pressing once we will go to the stage and do the same with the camera, we will continue to press the left mouse button and drag until we place the light. You can do this as many times as you want until you light up the scene to your liking.
Lighting options
When we place the lights, we have to tap into the options they offer us, because the light can be too weak to be noticed or, on the contrary, too strong. To do this we will go to the second tab that we find next to the “+” tab. Select the light you want to change and in this tab you will see the light options. Here, you will be able to change the type of light and the brightness it will make, as well as the color of the light it will emit.
Render settings
Now that everything is set up, both lights and camera, let’s take a look at the render settings.
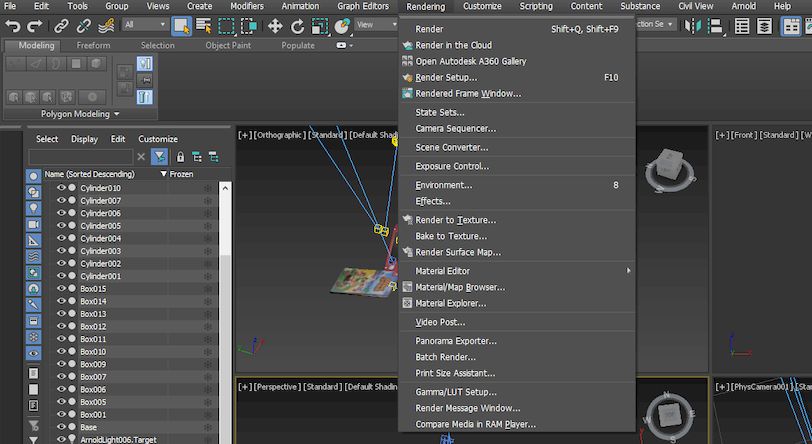
To access the changes in the render settings, we will go to the “Rendering” option. We find this option in the first toolbar. We will click it and another menu will open. In this menu, we will select the “Render Setup” option.
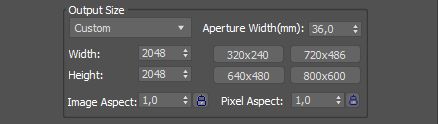
When we enter the option, a new window will appear. In this window you can configure the render, which we will get later. If we see it in the window, we can change the final resolution of the render in the “Output Size” option. In my case, I’ll leave it at 2048 * 2048.
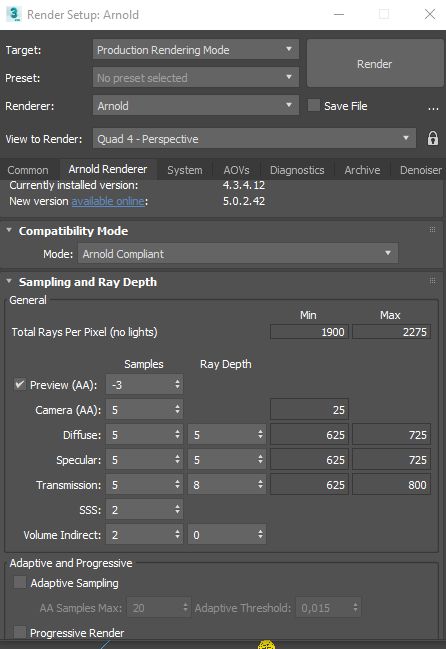
Now we can access more settings if we go to the second tab called “Arnold Render”. If we look a little further down this tab, we will see a series of numbers. These numbers mean that the higher they are, the higher quality the image will be. But we have to keep one thing in mind, the older it is, the longer it will take to final render and this is not supported by all computers. So 4 to 6 is fine. I will leave at 5.
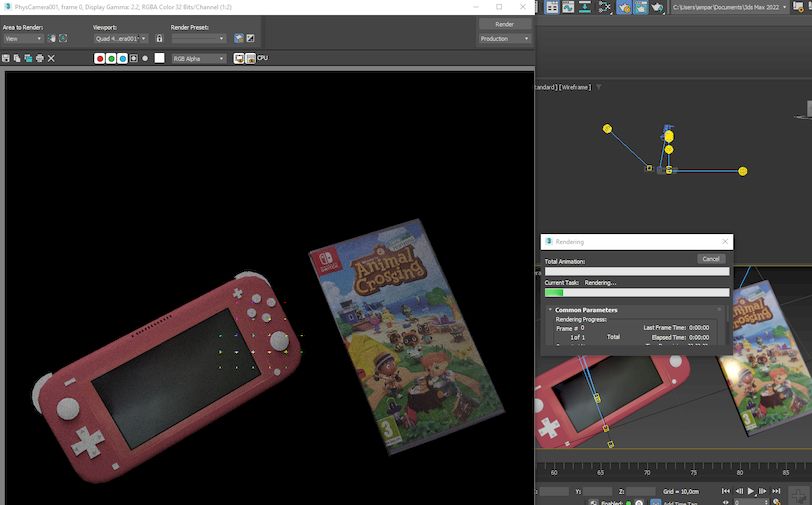
Processing
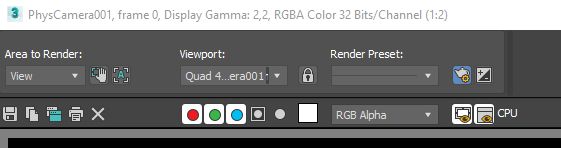
The last step is to render, for this we will select the window in which we place the camera image. In the same previous window, where we placed the numbers, we will see the “Render” option above. We will press this option to start the rendering process. When you do, one window will appear to see how the rendering is going and another window to see the rendering progress. You just have to wait for it to finish.
Saving the image
After the rendering process is finished, we can save the image to our computer. To do this we will go to the final creation window and we will find a disk icon in the toolbar. This icon is where we can choose where we want to save the image.